
A peephole and a plain buzzer don’t tell you much anymore. Whether you’re in a busy Lahore neighborhood, a quiet Islamabad street, or a gated community in Karachi, being able to see who’s at your gate before you open it is worth a lot. A smart video doorbell gives you that: answer the door from anywhere, watch deliveries arrive, and keep an eye on anything that looks off. How to Install a Smart Doorbell Camera.
If you’ve just bought one, like eGalaxy’s battery-powered Wireless Video Doorbell with Camera, the good news is that installation is genuinely a DIY job. This guide walks through it in order, and most people finish in under 30 minutes.
Why It’s Worth Doing
A smart doorbell earns its place quickly:
- Real-time alerts the moment someone approaches the entrance.
- Two-way audio, so you can talk to a courier, a guest, or an unexpected visitor even when you’re out.
- HD video and infrared night vision, for clear footage day or night.
- Visible deterrence against parcel theft and opportunistic trespassing.
Both the battery-powered X3 and the waterproof M9 HD 1080P model in eGalaxy’s Smart Doorbell range are built for local conditions: heat, dust, and monsoon rain. If you’re still choosing between them, our smart doorbell camera buying guide explains which features matter.
What to Have Ready
Gather everything before you start, so you’re not climbing up and down a ladder:
- The doorbell kit: camera unit, mounting bracket, charging cable, screws, and wall anchors.
- A charged smartphone connected to your home network.
- A stable 2.4GHz Wi-Fi router. Most smart doorbells use 2.4GHz because it penetrates walls better than 5GHz.
- Tools: a drill, a small screwdriver, a pencil, and a spirit level if you have one.
Step-by-Step: Install a Smart Doorbell Camera
Step 1: Charge and Test It Indoors
Mount nothing yet. Plug the doorbell into a USB charger and let a battery model reach 100%. When you power it on, a flashing light or a voice prompt tells you it’s in pairing mode. Keep it close to your router for this first setup.
Step 2: Install the App
Most smart doorbells run on Tuya Smart or Smart Life. Download it from the Google Play Store or Apple App Store, register with your email, and log in. Turn on Bluetooth and location services on your phone for now, as it speeds up device discovery.
Step 3: Pair It With Your Wi-Fi
- In the app, tap the “+” icon to add a device.
- Choose the matching category, usually Camera & Lock or Smart Doorbell.
- Enter your 2.4GHz network name and password. Double-check you’re not on the 5GHz band, since most smart devices won’t pair on it.
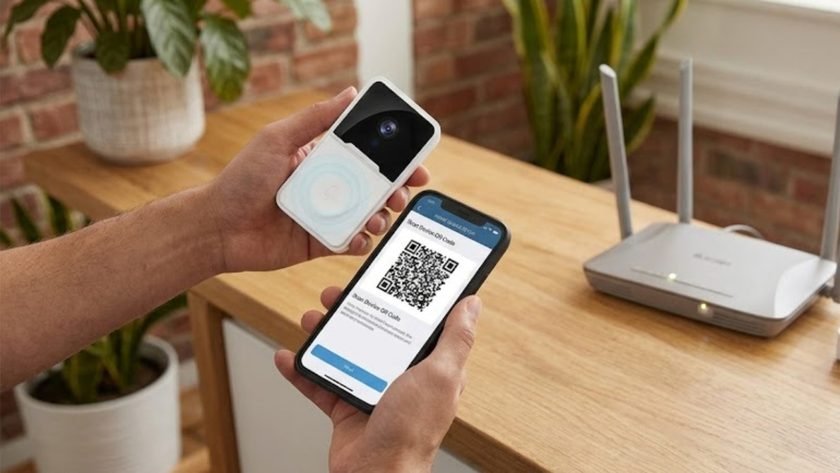
- A QR code appears on your phone. Hold the doorbell lens a few inches from the screen so it can scan it.
- Wait for the confirmation beep, tap Next, and name it something like “Front Door”.
Step 4: Pick the Right Spot
Location decides how useful the doorbell actually is.
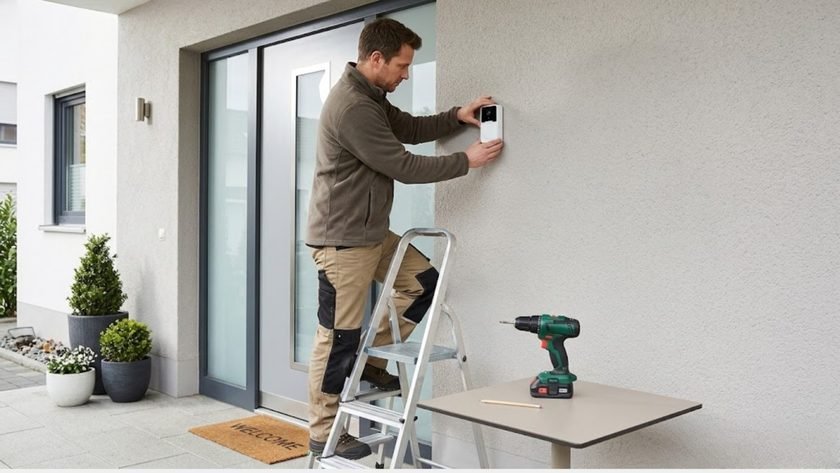
- Height: about 4 to 4.5 feet (1.2 to 1.4 meters) off the ground. That captures faces clearly while still showing the doorstep.
- Surface: brick, wood, or tile each need a slightly different approach. Brick and concrete will need wall anchors.
- Signal: before you drill anything, hold the doorbell against the spot, open the live feed on your phone, and check the Wi-Fi signal. A weak signal at the door means laggy video, so fix that first (a Wi-Fi extender or moving the router helps).
Step 5: Mount the Bracket and Fix the Doorbell
- Hold the bracket against the wall at your chosen height and mark the screw holes with a pencil.
- Set the bracket aside. For masonry, drill holes sized to your wall anchors and tap the anchors in.
- Line the bracket up again and drive the screws in until it sits firmly flush against the wall.
- Slide or snap the doorbell onto the bracket, then lock it with the security screw if your model has one. That screw makes it harder to steal.
Tune the Settings Afterward
Installation isn’t finished until the software is set up well. A few minutes in the app makes a big difference:
- Motion sensitivity. Dial it to Low, Medium, or High so passing traffic or stray cats don’t flood you with false alerts, while a person walking up to the door still gets caught right away.
- Activity zones. If your app supports them, mask out busy pavements or the street so you only get alerts for activity on your own porch.
- Storage. Insert a MicroSD card or switch on cloud storage so you don’t miss footage of past visitors.
Common Problems and Quick Fixes
It won’t pair. Almost always a Wi-Fi band issue. Confirm your phone is on the 2.4GHz network during setup.
Video lags or drops. Weak signal at the mounting spot. Test the signal before drilling, and move the router or add an extender if needed.
Too many alerts. Lower motion sensitivity and set an activity zone that excludes the street.
Battery drains fast. Heavy motion traffic or a high-activity location uses more power. Reducing sensitivity usually helps.
Build It Into a Bigger System
A doorbell works best alongside other devices. Pair it with an Indoor Security Camera, add Door & Window Sensors on your entry points, and run it all from the same app. If you’re comparing it against a traditional camera setup, our guide on smart doorbell vs CCTV camera covers when to use each. eGalaxy’s Home Automation range covers the wider ecosystem.